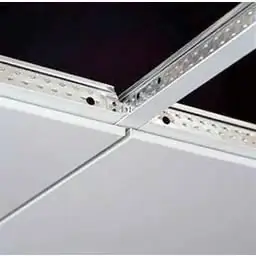
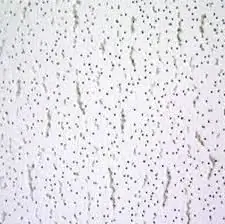
Armstrong ceiling is the most common design system. Its popularity is explained by the low price of the necessary components, the simplicity and speed of installation, and ease of maintenance. The Armstrong system consists of a structure of profiles attached to the ceiling in a special way, and gypsum boards fixed to this structure. In addition, special raster lamps, ventilation elements, loudspeakers can be attached.

Necessary components: profiles, quick hangers, fittings. The main components needed to assemble the Armstrong system are metal profiles. They come in three types:
- supporting profile (3 meters and 60 centimeters);
- perpendicular additional profile (1 meter and 20 centimeters);- transverse additional profile (60 centimeters).
Armstrong ceiling in calculations
The length of the profiles is a multiple of 6, since the side of the Armstrong plate is 60 cm long. In order to calculate the required amount of materials, it is necessary to know exactly the dimensions of the room in which the Armstrong system will be installed. At the same time, the ceiling may not be rectangular, and the dimensions should not exceed 3.6 m. This system can be used in almost any room.
In order to calculate the required number of plates and profiles, you need a sheet in a cage. Just remember that one square is not 50x50 cm, but 60x60.

Next count like this:
1. Draw a figure identical in shape to the ceiling.
2. Every 2 cells draw a strip - these are load-bearing profiles, the length of which is 3.6 m.
3. Every 2 cells perpendicular to the carriers, draw stripes in a contrasting color. These are additional profiles, the length of which is 1.2 m each.
4. Connect additional profiles transversely.
5. Calculate the perimeter and divide the resulting number by 3. This will be the number of corner profiles (3 meters long).
6. Count the number of profiles of each color and the number of slab squares. If you plan to install lamps or other elements, their number must be subtracted from the number of plates.7. The number of quick hangers depends on the characteristics of the room. It can be approximately calculated as follows: multiply the number of carrier profiles by 3.
Suspended ceiling "Armstrong". Installation procedure

Before proceeding directly with the installation, it is necessary to lay all communications along the ceiling: wiring, alarm, fire system, and also bring all the electrics to the lamps, if they are to be installed.
Installation sequencethe same as the calculations. Before installing the "Armstrong" ceiling, it is necessary to determine its lower limit using a level. It is advisable to outline or mark the entire perimeter with a laser. Scheme of further work:
1. Attach corner profiles. This can be done with self-tapping screws.
2. Mark the attachment points of the main profiles (every 120 centimeters), attach them using quick hangers, approximately 3 pieces per profile.
3. Install profiles perpendicular to the carriers with a length of 120 centimeters.
4. Perpendicular to them, install profiles 60 centimeters long.5. Install stoves, fixtures.
Operation
With proper installation and care, the Armstrong ceiling can last for many years. Its undoubted advantage is the ability to easily dismantle any part of it to access various sections of the ceiling, if necessary, for example, in case of damage to wiring, replacement of lamps.


